Last step for this PythonParts example, I’ll show you how to set up a legend for our object.
This should include the following information :
- my object’s name ;
- the name of a characteristic geometric property ;
- finally, its value.
1) GUI Script
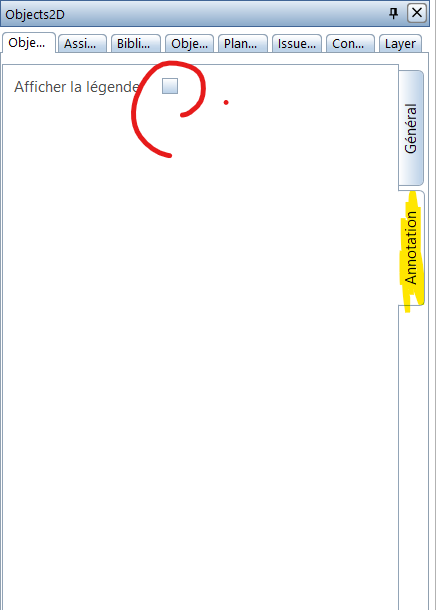
First, in my palette, I’m going to create a tab dedicated to annotating my object with Page.
<Page><Name>Page2</Name><Text>Annotation</Text></Page>
As seen previously, the Text field contains the character string visible from the Allplan’s palette.
Then I place a checkbox for the user which will be unchecked by default with the False value :
<Parameter><Name>ShowTextCheckBox</Name><Text>Afficher la légende</Text><Value>False</Value><ValueType>CheckBox</ValueType></Parameter>
Now I create some controls to customize the text such as height or alignment :
<Parameter><Name>TextHeight</Name><Text>Hauteur</Text><Value>4</Value><ValueType>Length</ValueType><Visible>ShowTextCheckBox == True</Visible></Parameter><Parameter><Name>TextAlignment</Name><Text>Alignement</Text><Value>Aligner à Gauche</Value><ValueList>Aligner à Gauche|Centrer|Aligner à Droite</ValueList><ValueType>StringComboBox</ValueType><Visible>ShowTextCheckBox == True</Visible></Parameter>
Please note :
- height is a float with Length ;
- the choice of alignment is a fixed predefined list with StringComboBox ;
- I don’t forget to manage the visibility of my object according to the state of the ShowTextCheckBox checkbox.
Finally I prepare a hook point (which will be hidden) for my future label with a Point3D :
<Parameter><Name>TextOrigin</Name><Text> </Text><Value>Point3D(0, -1000, 0)</Value><ValueType>Point3D</ValueType><Visible>False</Visible></Parameter>
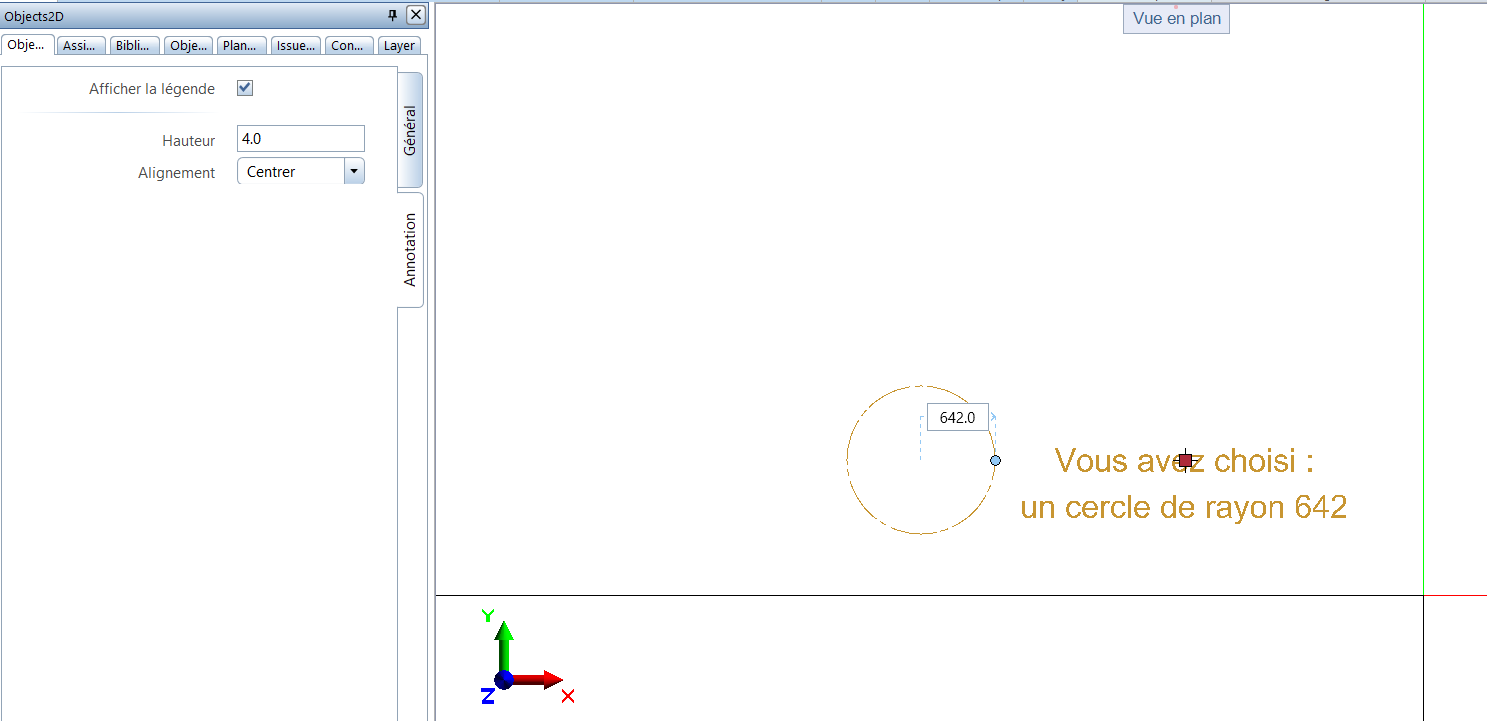
In Allplan I see :


Here is the complete source code :
2) Main Script
I’m going in my create_element function, and I extract the informations from my palette :
is_showing_annotation = build_ele.ShowTextCheckBox.value
# Define text propertiestext_dict = {« Aligner à Gauche » : BasisElements.TextAlignment.eLeftMiddle,« Centrer » : BasisElements.TextAlignment.eMiddleMiddle,« Aligner à Droite » : BasisElements.TextAlignment.eRightMiddle}text_prop = BasisElements.TextProperties()text_prop.Height = text_prop.Width = build_ele.TextHeight.valuetext_prop.Alignment = text_dict[build_ele.TextAlignment.value]text_origin = build_ele.TextOrigin.value
Please note : I use a dictionary to bind the alignement’s choice selected by the user to the PythonPart syntax.
In each previously generated child class, I will now specify a variable for my object’s name, the name of the characteristic geometric property, and its value :
First I go into my parent class to initialize these new variables :
-
Object2D
self.name_object = « »
self.name_dim = « »
self.dimension = « »
-
Line2D (line’s length)
self.name_object = « une ligne »self.name_dim = « longueur »self.dimension = round(self.line_length)
-
Rectangle2D (rectangle’s surface)
self.name_object = « un rectangle »self.name_dim = « surface »self.dimension = round(self.rect_length * self.rect_width)
-
Circle2D (circle’s radius)
self.name_object = « un cercle »self.name_dim = « rayon »self.dimension = round(self.circle_radius)
Back in my create_element function, I will now create my legend if the box is checked :
# Create the annotation
if is_showing_annotation:
I concatenate my different variables using an f-strings :
text = f« Vous avez choisi :\n{object_2d.name_object} de {object_2d.name_dim} {object_2d.dimension} »
Please note : I use \n to make a line break.
My legend is a 2D object, so its origin must be a Point2D.
However, to create my handle point my variable defined in the palette must be a Point3D, so I have to convert it :
origin = Geometry.Point2D(text_origin)
Now I can launch the legend’s creation with TextElement by indicating :
- rendering properties (color, …) ;
- the properties specific to the text (alignment, …) ;
- the text to display ;
- the point of origin.
pyp_util.add_pythonpart_view_2d(BasisElements.TextElement(com_prop, text_prop, text, origin))
Finally, I create a handle to freely place my annotation.
This handle directly affects a Point3D, so its syntax is :
text_handle = HandleProperties(« Text »,
text_origin,
Geometry.Point3D(),
[HandleParameterData(« TextOrigin », HandleParameterType.POINT, False)],
HandleDirection.XYZ_DIR
)
text_handle.handle_type = IFWInput.ElementHandleType.HANDLE_SQUARE_RED
text_handle.info_text = « Origine du texte »
handle_list.append(text_handle)
Please note : to customize the handle’s symbol, I first imported the following function :
import NemAll_Python_IFW_Input as IFWInput
Here is the complete source code :
We have seen how to set up an annotation for our object containing its own variables.
Through this example, we deepened the use of our classes taking advantage of the power of OOP.


0 Comments